A blunder is a simple yet serious mistake that you would normally notice immediately, but for some reason, you miss it in the moment.
To reduce blunders, we need to understand what happens in moments of oversight. Once we know how and why these mistakes occur, we can turn to practical exercises that help us avoid them.
This lesson is also available as an interactive lichess study:
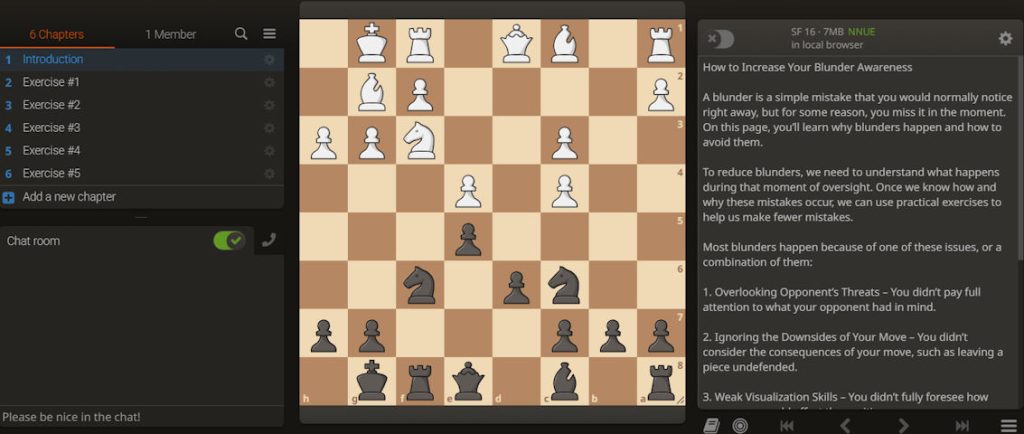
I’ve collected a series of blunders from real games. Some of these players were rated over 2000, proving that blunders can happen to anyone!
By working through these exercises, you’ll learn how blunders occur and what to watch for, allowing you to integrate this awareness into your thinking and make avoiding blunders a natural part of your play.
Exercise #1
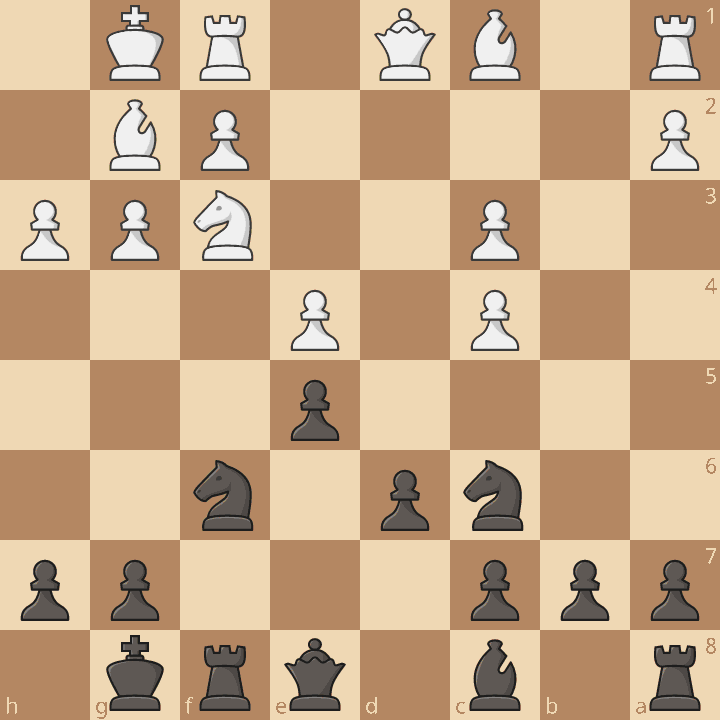
Diagram: Black intends to play Nxe4. Why would this be a blunder?
Answer:
After Nxe4, White can play Qd5+, followed by Qxe4. By moving the knight from f6, Black seems to have overlooked that they left the d5 square undefended (allowing Qd5+) and placed the knight itself on an undefended square.
In the initial position, Be6 would have been a safe move.
Note: These exercises may seem easy, but that’s intentional. The goal isn’t to explain why a move was a blunder, but to understand what caused the oversight. By recognizing the flaw in the thought process, you’ll be better prepared to avoid similar errors in future games.
Exercise #2
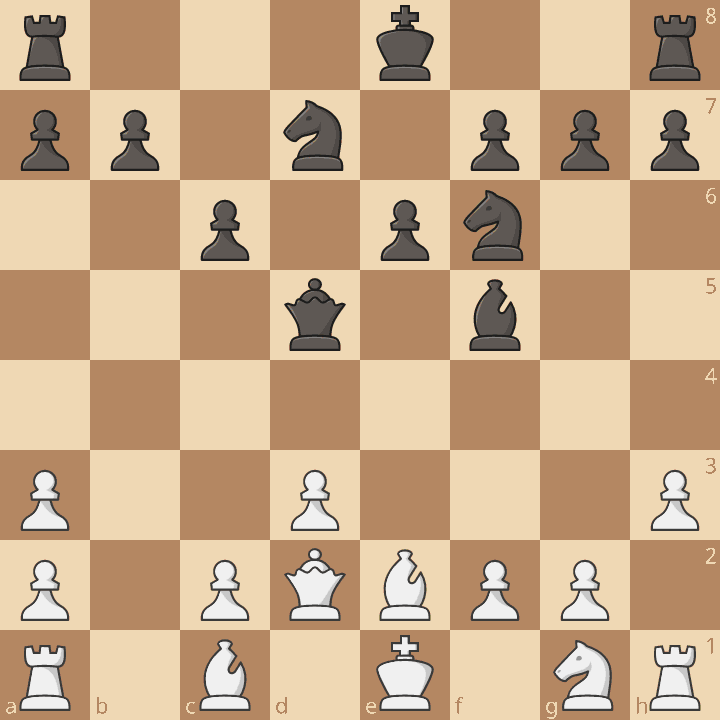
Diagram: White intends to play Bf3. Why would this move be a blunder?
Answer:
White probably wanted to defend the pawn on g2, attacked by Black’s queen. However, Bf3 not only exposed White’s king on the e-file, but also suggests that White lacked full board awareness, failing to notice that the rook on a1 was undefended and could be captured by the Black queen.
In the initial position, Nf3 would have been a safe move.
Exercise #3
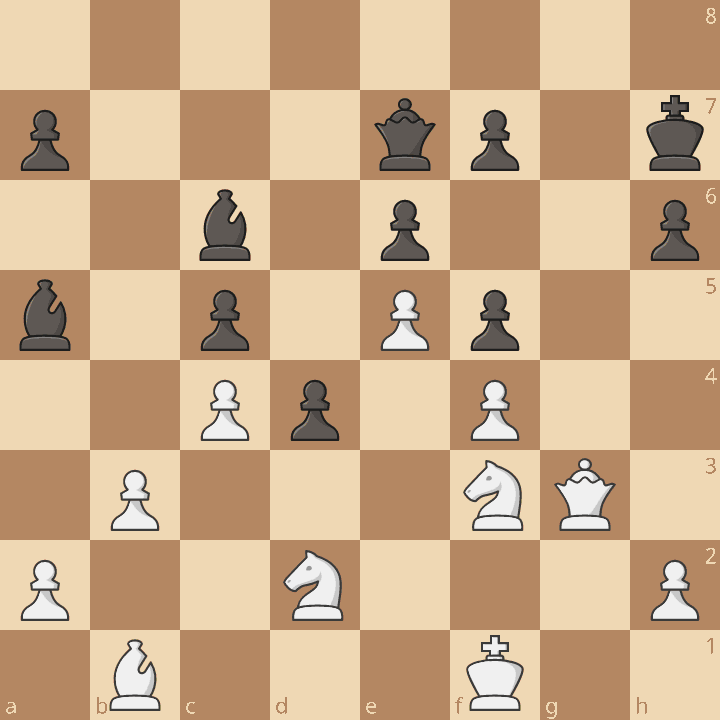
Diagram: White intends to play Qh4. Why would this be a blunder?
Answer:
Black can play Qxh4, and after Nxh4, capture the now undefended knight on d2 with Bxd2. This blunder is likely due to poor tactical skill: White didn’t foresee that their knight on d2 would become undefended, probably because they weren’t sufficiently familiar with the concept of overloading the defender.
In the initial position, Ke2 would have been a safe move.
Exercise #4
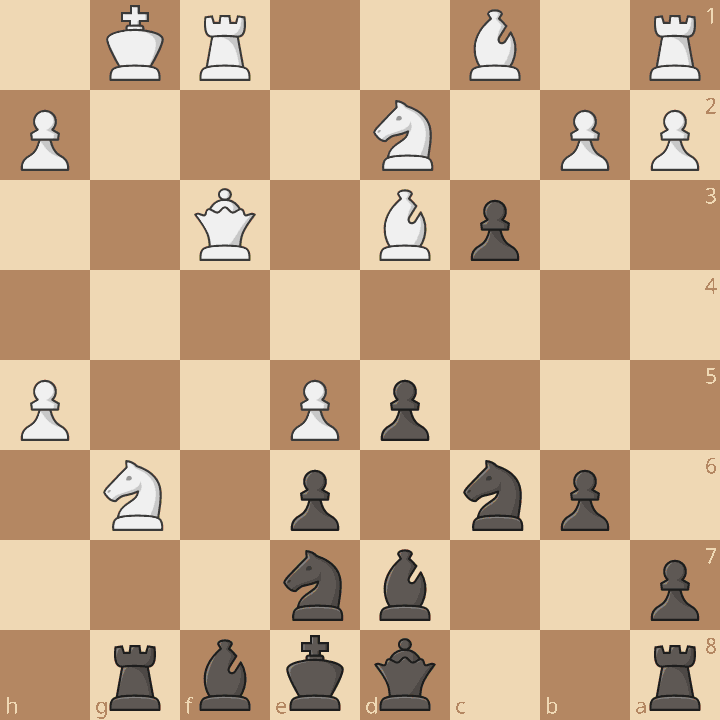
Diagram: Black intends to play Nxe5. Why would this move be a blunder?
Answer:
In the initial position, Black may have seen White’s threat, Qf7#, and thought that Nxe5 would also defend the f7 square. Additionally, White’s knight on g6 is pinned, so white can’t play Nxe5. However, seeing one threat doesn’t mean you saw them all!
In the initial position, Nf5 (the knight on e7) would have a much better move.
Exercise #5

Diagram: White intends to play Rg2. Why would this move be a blunder?
Answer:
Either a lack of tactical skill or a lapse in concentration likely caused White to overlook that their rook on g2 would be pinned and therefore unable to defend against the fork, Ng3+.
In the initial position, white’s only other move, Kg1, would have been safe.
Conclusion
In chess, brilliance is exciting and can turn a game in a single move, but it is not what decides most outcomes. Focusing on solid, safe moves have a far greater impact on results.
This is not to downplay the value of brilliant moves—they are still important—but to encourage you to set your priorities correctly. By know that by mastering the fundamental skill of minimizing blunders, you not only improve your results but also create the conditions where true brilliance naturally follows.
I suggest that for your next couple of games, you focus on avoiding mistakes. By prioritizing solid, safe moves, you will likely see good results, prevent unnecessary losses, and gradually build a foundation for stronger, more confident play.